Installation
Requirements, install folder, and guided setup for Tidal 2.
Requirements
Tidal 2 targets modern GPU-driven rendering and requires a current Unity and URP setup:
- Unity 6 (6000.0+) with URP 17 and its RenderGraph API.
- No Built-in or HDRP support.
- VR/XR was withdrawn from 2.0 (it returns later as an opt-in package configuration).
Assets/Tidal 2. The editor
tooling references content by this path (for example the Welcome window's demo-scene button and
its animation), so renaming or moving the folder breaks those references.
TextMesh Pro Essentials
TextMesh Pro Essentials must be imported for the demo scene UI text. The demos
reference the canonical LiberationSans SDF font, which only resolves once TMP
Essentials exists in the project.
The "Water" layer
A "Water" layer should exist in the project's layer list. Newly created volumes and zones default their Affected Layer Mask to it (falling back to Everything when the layer is missing), and Tidal's hidden runtime cameras are placed on it so the underwater pass skips them.
Setup
1. Import & the Welcome window
Import the asset. The Welcome window opens automatically on first import and shows the current setup state along with helpful links.
If it is closed, reopen it at any time from:
Window → Tidal 2 → Welcome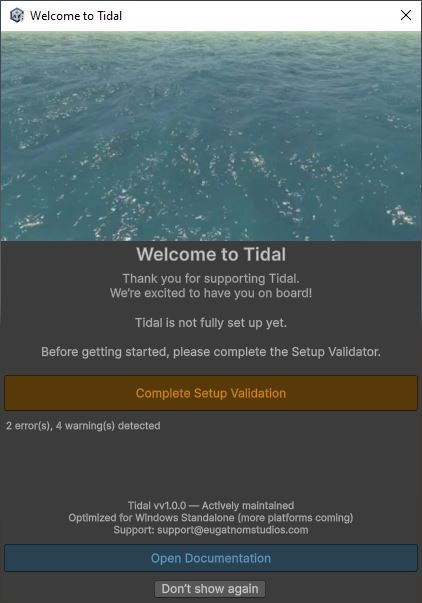
2. Add the Render Feature
Add TidalRenderFeature to the active URP Renderer asset
(Universal Renderer Data → Add Renderer Feature). Use one feature per renderer -
it installs the surface, underwater, and meniscus passes and assigns per-body rendering layers
automatically.
UnderwaterEffectFeature from your
URP renderer and add TidalRenderFeature. The validator flags this automatically. See the
upgrade guide.
3. Run the Validator
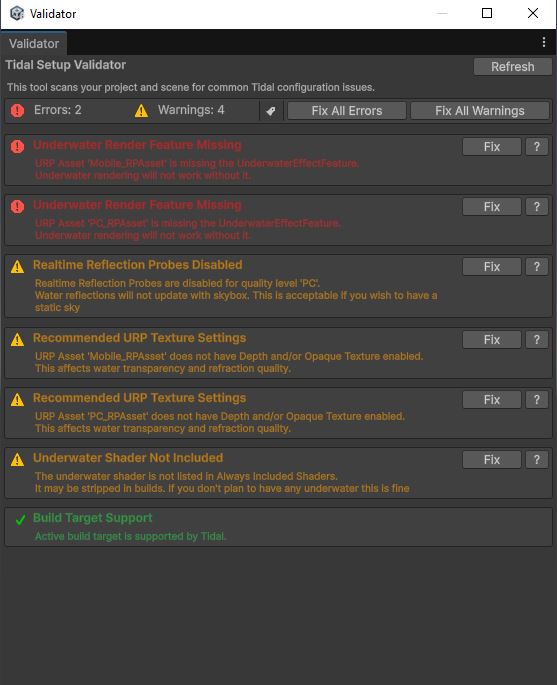
Run the Validator to catch every known misconfiguration - including build-only issues such as required bake shaders missing from Project Settings → Graphics → Always Included Shaders.
Window → Tidal 2 → Validator
The validator is also surfaced at the top of the TidalBody inspector. Each fixable
issue includes a fix button; keep resolving them until it reports
"Tidal 2 is ready".
Per-quality-tier setup
Each URP renderer asset (PC / Performant / Mobile, and so on) carries its own
TidalRenderFeature instance with its own Underwater Defaults -
Volume Masks, God Rays, Volumetric Lights, and the Volumetrics Resolution budget. Configure each
tier once, and bodies set to Use Render Feature Setting follow the defaults of whichever
renderer is active, so quality tiers switch automatically.
- Project on Unity 6 (6000.0+) with URP 17.
- Asset installed at
Assets/Tidal 2. - TextMesh Pro Essentials imported (for demo UI).
- A "Water" layer present in the layer list.
TidalRenderFeatureadded to every URP renderer you build with.- Validator green - "Tidal 2 is ready".